There’s something truly magical about sourdough bread. Its crisp crust, tender crumb, and complex flavors are the product of a centuries-old tradition that never ceases to amaze me. I’m excited to share my passion for sourdough with you and guide you through the process of baking your first sourdough recipe. It may seem daunting at first, but with a bit of patience and a willingness to learn, you’ll soon be on your way to becoming a sourdough artisan.
This site may contain affiliate links to products. We may receive a commission for purchases made through these links.
Ingredients:
- 80g active sourdough starter
- 250g lukewarm water (about 92 degrees)
- 325g bread flour
- 25g whole wheat flour
- 10g salt
*Of Note: You can use 350g of bread flour or AP flour if you don’t have whole wheat flour. The wheat flour adds a dimension of flavor to the bread that I really like. It still comes out great with other flours
Equipment:
- Mixing bowl
- Kitchen scale
- Clean kitchen towel or plastic wrap
- Proofing basket or a bowl lined with a tea towel
- Dutch oven
Instructions:
Feeding Your Starter : Before you begin, ensure your sourdough starter is active. If it has been in the fridge, take it out and feed it with equal parts flour and water. Allow it to sit at room temperature for 6-8 hours or until it’s bubbly and has doubled in size. A vigorous starter is the key to great sourdough.
Mixing the Dough : In a mixing bowl, combine the active starter and lukewarm water. Stir until the starter is mostly dissolved in the water. Add the flour. Let rest for about 30 minutes then and salt. Mix until a shaggy dough forms. Don’t worry if it seems rough at this stage; the magic happens during fermentation.
Bulk Fermentation : Cover your dough with a clean kitchen towel or plastic wrap and let it rest for about 30 minutes. This period allows the flour to fully hydrate and the gluten to start developing.
Stretch and Fold : Perform a series of “stretch and fold” every 30 minutes for the next 2-3 hours. To do this, wet your hands and reach underneath the dough, then gently stretch one side of the dough up and fold it over the rest of the dough. Repeat this process for all sides of the dough. This technique helps develop the gluten structure. On your last fold, grab from the middle rather than the sides.
Bulk Fermentation Continues: Let your dough rest at room temperature for another 2-3 hours, or until it has doubled in size. The exact time will depend on your environment and the activity of your starter. Patience is key here; don’t rush the process.
Shaping Your Loaf : Gently turn the dough out onto a lightly floured surface. Shape it into a round or oval loaf, depending on your preference. You can find various techniques for shaping online, or you can simply shape it into a round ball.
Final Proofing : Then you will place your shaped dough into a proofing basket or a bowl lined with a floured tea towel, seam side up. Cover it with the towel and place it in the fridge overnight.
Preheat Your Oven : About 30 minutes before you’re ready to bake, preheat your oven to 450°F (232°C). If you have a Dutch oven, place it in the oven while it preheats. The Dutch oven will act as a mini steam-oven within your oven, creating a perfect baking environment for your bread.
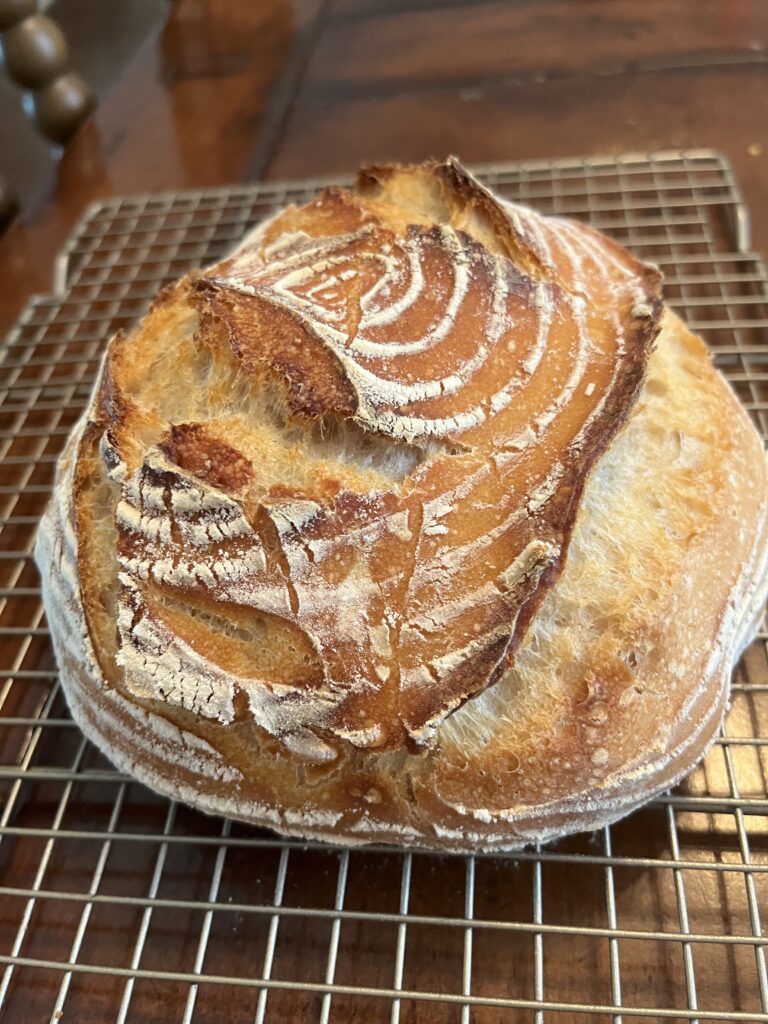
Score and Bake : Carefully remove the preheated Dutch oven from the oven. Turn your dough out of the proofing basket onto a piece of parchment paper. Score the dough with a sharp knife or a lame (a special tool for this purpose). This allows the bread to expand properly during baking. Add a thin layer or uncooked rice to the bottom of your dutch oven, this prevents the bottom from becoming too done. Finally, place the dough, parchment paper and all, into the hot Dutch oven. Cover it with the lid and put it back in the oven. Bake for 30 minutes with the lid on. Then, remove the lid and bake for an additional 15 minutes, or until the bread has a deep, golden-brown crust.
Cool and Enjoy : Once your sourdough has achieved the desired color and sounds hollow when tapped on the bottom, remove it from the oven and let it cool on a wire rack. It’s essential to allow your bread to cool for at least an hour before slicing; this lets the crumb set properly.
Baking sourdough is an art, and like any art form, it takes practice to master. I’m thrilled to have shared this recipe with you, and I encourage you to embrace the journey of becoming a sourdough enthusiast. Starting with the basics is key, but don’t be afraid to experiment and fine-tune your recipes along the way. Soon, you’ll be delighting in your very own sourdough and wow-ing your family along the way! Happy baking!
This is awesome!! Thank you for sharing!
Wow! I’m definitely going to give this recipe a try! Thanks for making it look easy! Lol👍❤️